Planned Parenthood for Plants

.
March 15 marks the day every year when I start feeding my houseplants for the growing season. I use seaweed fertilizer, which has that familiar rank odour of rotting kelp to remind me of the ocean beaches. Still, it’s much more bearable to my sensitive sniffer than fish fertilizer, and far preferable to inorganic chemical compounds for plant health.
Last summer I was able to raise a few outdoor coleus babies from cuttings off a live mother plant. Having wintered indoors, in a location so devoid of daylight that no other plant in the Treehouse will tolerate it, the babies survived to be healthy and reasonably bushy:
.
.
They definitely got a little “leggy” over the winter, though. That makes them the perfect candidates for planned plant parenthood.
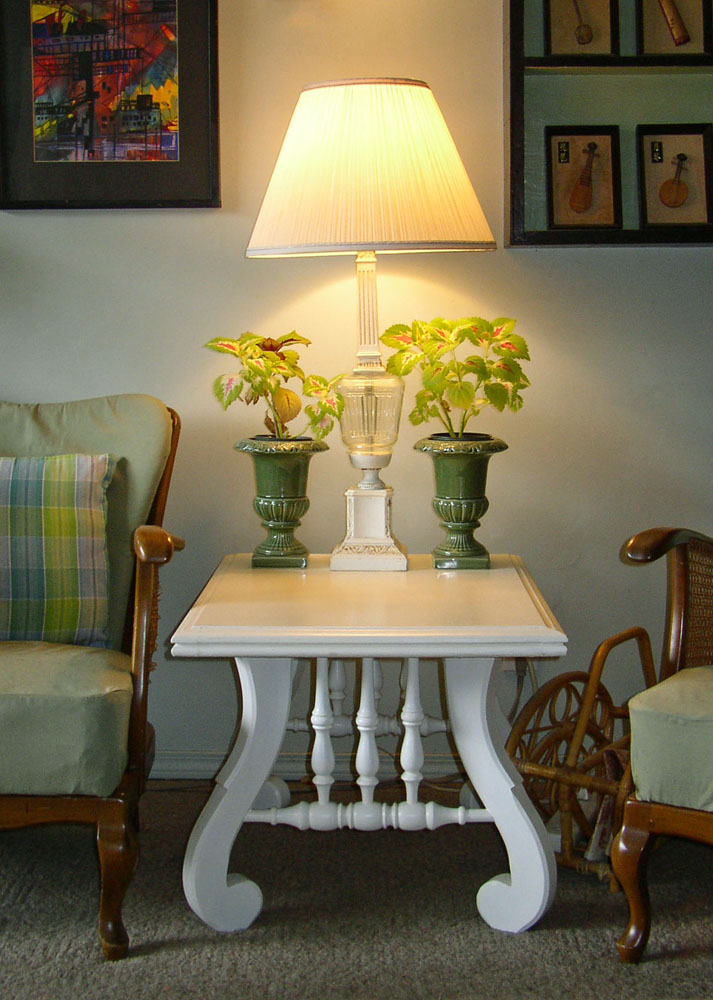
Incidentally, this gorgeous, French-looking end table came to me when my dad passed on, wearing its original dark brown finish. This table has been in my family so long, I remember curling up under there during games of hide and seek. To me, the shape of the legs and spindles have always resembled the curves and strings of a musical instrument. I sought my mom’s permission to paint it black, then later decided white was much better for showing off beautiful silhouettes.
.
If you’ve never propagated plants before, taking cuttings and rooting them in water is a method as old as your great-granny’s great-granny, times four thousand or so. You can root a lot of different plant babies this way. I grew my begonia as a water-rooted cutting, and have grown many houseplants using the same method, including Chinese Evergreen, Golden Pothos, the enormous monstera, and others. Anyone with a cutting and a glass for water can try this.
.
.
When you take cuttings off the plant, be sure to leave a few nodes (places where leaves grow out of) on the mother – this way, your original parent plant will still survive to sprout fresh leaves below the cut you make.
Take cuttings that are healthy and strong, with a few leaves on them. Just like the leaves grow from the nodes on the parent plant, the roots also grow from the nodes left on the cuttings (plants are amazing!), so you are going to need these sections of stem.
.

.
When you have enough cuttings, trim away the leaves on the lower part of the stem. Ideally, you want to leave 2 – 4 leaves at the top of the stem, and have at least one set of nodes for the roots.
My mother coleus both have huge strings of roots growing out of the bottom of the pots. When you see this happen to your plants, it means it’s TIME TO RE-POT. The plant is potbound, and desperately searching for water and food. It needs a bigger container (try to only go the next size up) in which to spread out.
This time, though, I’m going to leave the mother plants in their tight pots, roots and all. These particular plants are using their roots to get down to the bottom of the outer container they live in, where the water collects. I don’t need to disturb them until I re-plant them on the balcony in the better weather.
.
.
Once you have trimmed your cuttings down to a few leaves, stick them in a vase or a glass, fill it with water, and mingle your new temporary greenery in with your decor. Somewhere near a window but not in one is best. Make sure the nodes are immersed underwater. Change the water once in awhile, and keep it topped up, but otherwise, leave them alone.
The 3 vases I used for the coleus all have perfect narrow openings for cuttings. I found all 3 for under a couple of dollars each, on two different thrifting adventures. Gardening and decorating do NOT have to be expensive!
.
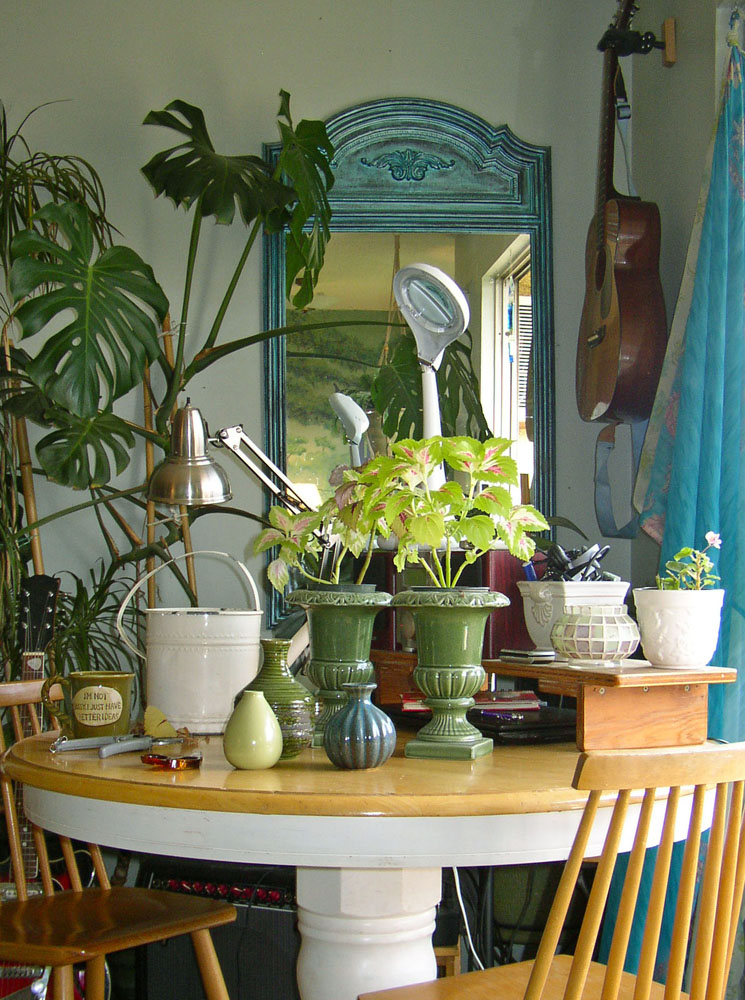
By the way, the doorway into the kitchen is the one part of the mural that wasn’t originally shown in my dining room post, so here’s what it looks like towering above the tiny coleus cuttings. You can also see a monstera, currently rooting the same way in a more gigantic narrow-mouthed vase, in the corner of the photo:
.

.
Also, spray-painting this thrifted wicker shelf ($2!) was the best I could do at decoratively accommodating the internet router. If we have to keep these plastic boxes out in the open for the wireless, they could at least make them look nicer. They can make a litter box that looks like an aspidistra. Make the router look like an African Violet, people!
.
If you’ve ensured the nodes on your cuttings have remained underwater, it won’t be long (3-4 weeks) till you see little thread-like roots growing out of them. Wait till the roots are at least an inch long before potting, then be sure you treat them gently, use sterile soil, and give them lots of time to harden off if you are putting them outdoors.
When your coleus babies are ready to live like grown up plants, they will like a bit of morning sun and protection from the rest of the day. They also do well in shade and dappled shade, and prefer to be kept reasonably moist, but not sopping wet.
.
Now that spring is here in the Northern Hemisphere, I hope all you gardeners out there are pondering seeds, drawing diagrams, and getting excited! Happy plant parenthood!
.
Dodie Goldney
Back to Top | Home | Audio | Video | About
related posts by Dodie Goldney:
Coleus Roots and Crazypants Time
.

love your displays! beautiful!
Thank you very much! I’m afraid my coleus display doesn’t look very beautiful now that I’ve hacked it up for cuttings, though. 🙂
Cuttings are worth it though 😛
You do have the old “green thumb” with plants.
Says the woman with an entire beautiful garden, ha ha. Thanks Mom. 🙂
seven or eight weeks at least in ideal light and moisture conditions.Sarasota plant nursery
I find coleus root much more quickly than 7 – 8 weeks. Last summer it was 3 weeks. Most of my house plants take a couple of months, though. 🙂